Service 7 Days a Week

Proudly Serving Central Maryland
5 DIY Plumbing Projects You Can Tackle Yourself

Save Time, Call Prime!
Sometimes you just don’t want to call a plumber for small tasks. Get ready to impress your housemate, significant others, kids or your cat….below are a few projects you can easily do yourself.
Before you attempt any of these projects, make sure you know where your main water shut off valve is in your home and test it to ensure it’s working properly. Simply close the valve and run a faucet until the water stops flowing.
1. Fix a Leaking Hose Spigot
Water hose leaks can be frustrating. The most common place a leak forms is at the connection with the water spigot. Fortunately, this is a SUPER easy repair. Typically, your culprit is a cheap, easy to replace washer. But before you replace anything, tighten the metal handle-packing nut (under the handle) with a wrench to see if that stops the leak. If it does not, you will need to unscrew the handle or the spout.
- First, be sure to turn off the water supply and drain all the water from the spigot by turning it on and allowing it to run dry.
- To replace the handle washer, remove the screw that holds the handle in place.
- Use a wrench to unscrew the packing nut and pull out the valve assembly.
- There may be two washers to replace. Replace one or both washers and reassemble the valve and place back in spigot.
- Be sure to replace the handle before you turn the water back on to test it!
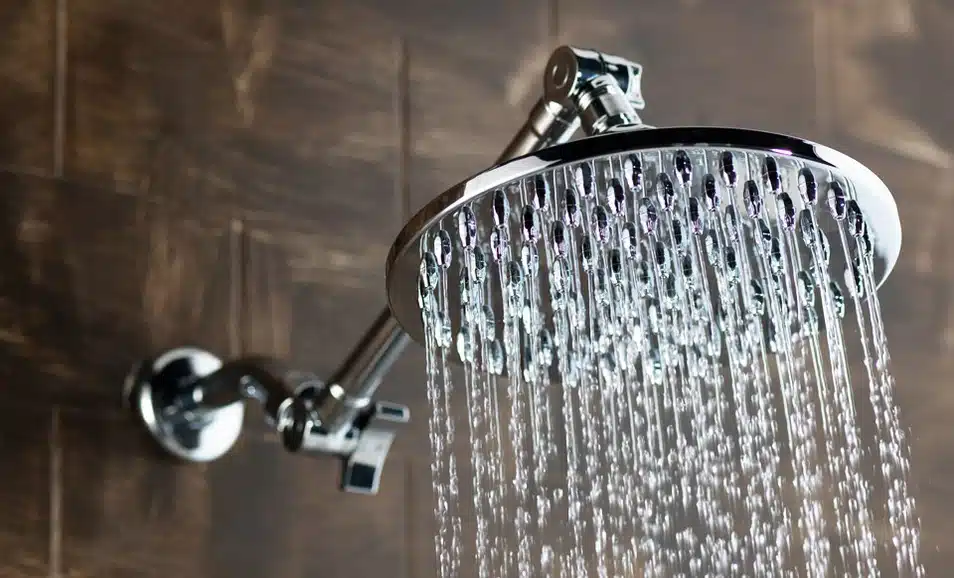
2. Revitalize Your Shower with a New Shower head
This is an easy way to make your shower feel like the Hawaiian waterfall you’ve always wanted.
- First, carefully unscrew the existing shower head. You may need a pair of pliers if the shower head has been attached for a while.
- If the showerhead is especially hard to remove, place a washcloth or something similar under the pliers to prevent slippage as well as and protect the nut.
- After removing the shower head, clean the surface of any residue and remove any old plumber’s putty or Teflon tape.
- If applicable, follow the instructions given by the manufacturer and apply new Teflon tape.
- Attach the new shower head and hand tighten it. You may use a wrench if necessary but avoid over tightening the fixture which could result in leaks or damage.
3. Unclog a Garbage Disposal
Clogged garbage disposals can be frustrating. Most of the time they can be easily fixed at home.
- First, check to see if the disposal is receiving power. Then, press the reset button on the bottom and turn the unit back on.
- If these things do not resolve the issue, it may be clogged. For the next step you will need a hex key that fits into the middle of the disposal. This tool may have come with your disposal. If not, you can use any standard hex key or pick up a disposal wrench at most hardware stores.
- Insert the hex tool in the hex-shaped hole under the unit. Crank back and forth a few times to break up any food that may be stuck. And always remember, DO NOT stick your hand in the disposal to turn the blades at any time.
4. Quick! Stop a Running Toilet!
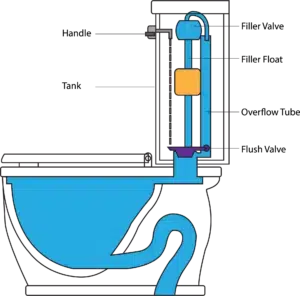
Toilets generally run when refilling the tank and then stop when the tank is full. If your toilet continues to run, it’s probably a sign of a broken flapper or fill valve. Luckily, these are easy to fix without professional help.
- Make sure to shut off the water to the toilet. There is usually a shut off valve underneath of the toilet.
- For the flapper, unhook the top and bottom connections and replace it with a new one which can be purchased at your local hardware store.
- For the fill valve, unscrew the nut that is on the bottom of the tank and lift it right out.
- Replace the fill value with a new one and screw the nut back into place.
5. Clear a Clogged Drain
There are a few ways you can go about unclogging sink drains. One of the easiest solutions is to make your own cleaner with just a few household items, boiling water, white vinegar and baking soda. If the drain is visibly clogged with standing water, you’ll want to first use a plunger to break up the clog, just as you would a toilet. This is a temporary fix. The drains are usually filled with a bunch of gunk and debris.
We DO NOT recommend the use of drain cleaning products like Drain-O or other harsh chemicals. It is especially dangerous to mix more than one type of product together which can lead to unwanted chemical reactions.
This is where the household items come in handy. To break up that gunk, you’ll need a chemical reaction.
- First, pour one pot of boiling water down the drain. Second, pour 1 cup of baking soda directly down the drain.
- Let the baking soda sit for 5-10 minutes.
- When the time is up, pour 1 cup of vinegar down the drain.
- Allow the mixture to foam and break up any gunk in the drain for another 5-10 minutes.
- After the allotted time, pour another pot of boiling water down the drain.
- Finally, allow hot water to run for 5 minutes. This will make sure everything in the drain is properly flushed away.
- You may repeat these steps over time to prevent sink gunk from building.
Most of these tasks can be done quickly and easily without many special tools. But, if you give them a try and are still having trouble, give us a call and we’ll be right over!
Have Questions or Need A Hand?
The Difference With Prime
Get a FREE second opinion on water and sewer service, and septic repair/replacements!
Don’t Just Take Our Word for it

Why Choose Prime Plumbing?
Professional Services at an Affordable Price
- Transparent Pricing
- No Additional Charges for Overtime
- Flexible Financing Solutions
- Thorough Employee Background Checks
- Complimentary Second Opinions


